Stencilled Napkins
Making your own Stencilled Napkins (Serviettes) is so easy and a very relaxing craft – add your own preferred decor to suit your needs or occasion
 is so easy and a very relaxing craft - add your own preferred decor to suit your needs or occasion")
Noticed how expensive Napkins (Serviettes) are these days? Especially for special occasions .. and I can never find exactly what I want.
To DIY your own Stencilled Napkins are so easy ! Pre-schoolers can do this if using a ready-made stencil and with a little help from you with the ironing part.
Buy a stencil (craft- hardware stores), DIY magazines like to share templates. Or look for a picture (magazines, internet, books specializing in templates or draw your own).
Use a large alphabet/numeric stencil for words or numbers. The possibilities are endless !
I usually make my own Napkins, cut to my preferred size and use the type of fabric for the event. It is also very easy to jazz-up old plain napkins.
Today I have only included a few which I have made over time. Note, the silver Rose on the black fabric and the red Rose on the white fabric were made from the same stencil.
The gold Flower on the white fabric is only part of a bigger stencil which I chose to use here.

Stencilled Napkins
What do you need to make your own Stencilled Napkins ?
- A cutting mat and craft knife first of all if cutting your own stencils
- Pictures you want to use
- A Sheet of stencil plastic – craft- and stationery stores keep these in different thicknesses (Buy 2 or 3 different ones to find the one you best work with)
- Fabric Paint (these are cheap and you can pick from a huge selection – or mix your own color)
- Foam roller and pan – you can use a paint brush as well but I find a roller works much better
- Tic-Tac Glue – this is a non permanent glue and it will stick your stencil to the fabric without any residue afterwards (Usually you also only need to apply a small amount once, and it’ll stay sticky for many projects)
Fabric Napkins - Clothing Iron (to set the paint permanently into the fabric)

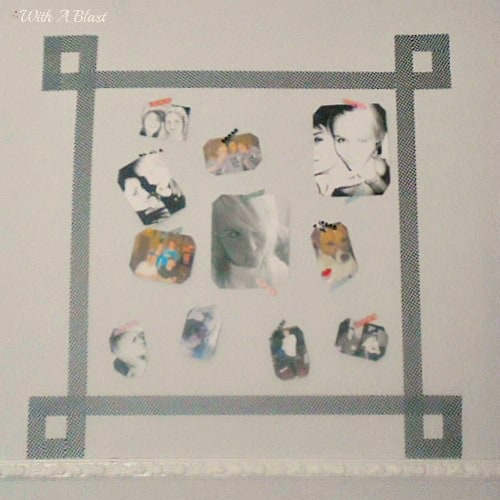
Photo above – I used the picture on the left to cut out the stencil in the following photo.
The template on the right was used to cut another stencil which I only used the far-right flower for the gold painted Flower.

I took the photo of this stencil after a few uses to make it easier to see what it looks like.

How to make your own Stencilled Napkins :
The fun part !
- Paste a small amount of Tic-Tac Glue to the back of the stencil
- Use a small brush to make sure all parts are covered as well as at least 15 mm (little less than 1/2 inch) around the edges of the picture
- Wait 5 minutes for the Glue to get sticky
- Place the stencil on the preferred area of the Napkin to be painted (glue side down on the fabric)
- Use the wooden/plastic end piece of a small brush and gently press down on all the areas of the stencil which has glue underneath
- Paint over the exposed (open) areas with either a roller or a paintbrush (Rather start with too little paint than too much – you can always go over the area again)
- Wait a minute or two and gently pull your stencil free from the fabric (you will find the stencil is still sticky enough for many more uses)
- Depending on the thickness of your paint, wait until it is dry to the touch (Because I use a roller my paint is never too thick and it dries within 5 – 10 minutes)
- Last, but very important, iron your masterpiece (between 2 sheets of paper or old fabric) on both sides. This will make it permanent and now you can use and wash them normally.
See HERE how I cut a stencil straight from wallpaper !
This is such a lovely, relaxing craft and I hope you will try it (if you are new to this) and enjoy it as much as I do!
For more Crafts and DIY’s – click here
Hi, Linda, I always loved stenciling myself. It always come out great! 🙂 Take care, Linda
Great job! I've not seen the Tic Tac glue before. Will have to see if I can find some.
I love these! Of course I love to stencil too. Thanks for sharing at my party.
Another great idea Linda. I think it would be so fun to make some for a special occassion. Thanks for sharing your talent with Share Your Cup.
Hugs,
Jann
Great idea!! Thanks for linking up to Tasty Thursdays at The Mandatory Mooch. Hope you will link up again this week. The party just went live at http://mandatorymooch.blogspot.com/2012/08/tasty-thursday-4.html
Thanks,
Nichi
What a cute idea! I love the beautiful flower pattern
http://www.iheartpears.blogspot.com
These turned out lovely!
Love this idea. I have been trying to get used to cloth napkins. Anything to make them cuter! Thanks for the tip.
I would love it if you would share this at the Smart Solutions linky party. You can link up here:
http://theprudentpantryblog.blogspot.com/2012/07/prudent-projects-and-smart-solutions.html
Have a great day!
Hi! This is super cool! Popping over from Everything & the Kitchen Sink – I’d love for you to visit me at jugglingactmama.blogspot.com
Oh, I love cloth napkins…I may need to pretty mine up a bit 🙂
Thanks for sharing at our Finished Friday Blog Party.
Great Idea. Now I have to think of something I want to stencil and get going.
This is so cute and briliant!!!
You should link this up to The CSI project starting today. The challenge is refashions/upcycles. This would be perfect and you just might be a winner!
Come on by!
http://www.thecsiproject.com
Cute idea! Thanks for sharing at the All Star Block Party!
Holly
This is great. I need a new table set for Christmas and it can be very expensive but I could get a nice plain set and then personalise it. Thank you
Maria Crafty Chic