DIY Pot Lid and Spoon Rest
DIY Pot Lid and Spoon Rest all in one ! No more hot, dripping lids on the counter top or stove – an easy DIY and it makes an awesome gift as well.

When cooking, how many times do you remove the pot lid to stir whatever you have going on the stove? Many times (usually), right?
I normally find myself either putting the hot, and dripping! The lid gets placed on the closest counter top, or even worse, somewhere on the stove !
Or I would stand there, stirring with the one hand, lid in the other hand – right, now I have tasted and oops… it needs some more Salt , Herbs or whatever.
Here comes the DIY Pot Lid and Spoon Rest all in one ! Which, by the way, will make an awesome DIY gift too.
Okay, so maybe I have a spoon rest, but what about the lid? Still in my hand probably, now dripping all over the floor because the Salt is waayyy over on the other side of the kitchen – it usually is !
Or the lid is on the counter top/stove merrily making a mess and maybe even scorching the counter top.
And you do not even have to buy a single thing, use what you have on hand. Let’s see what (my idea, hubby the executioner of said idea!) we did:
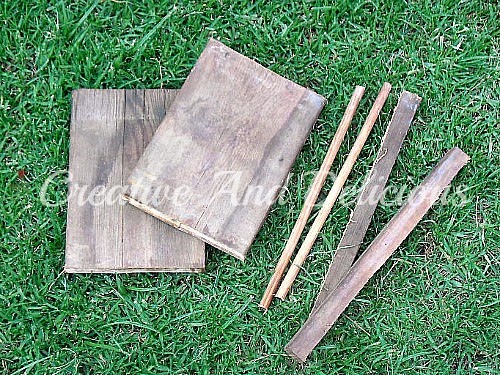
Above: old and dirty – not cleaned yet.
We have used old pieces of wood and leftover pieces of dowel sticks :
- 2 – 200mm x 140mm Wood planks (you can use 1 – 200 x 280mm)
- 2 – 25mm x 280mm Wood pieces
- 8 – Countersunk Woodscrews
- 2 – 8mm x 250mm Dowel sticks
- Wood Glue
- Drill and 7.5mm drillbit (for the dowel holes)
- Grinding Wheel (to make indentation for spoon and groove for the lid)
- Heat Resistant Clear Varnish Spray Paint
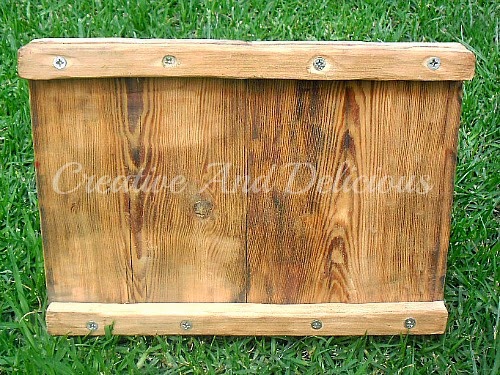
We used 2 pieces of wood for the base because this was the only wood we had closest to what I wanted for this project.
After we cleaned the wood somewhat, we used the two narrow pieces of wood to adhere the two base pieces and give it some height as well.
You can leave out this step if using a single base piece.
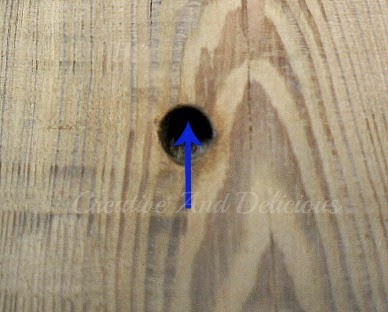
Hubby then drilled two holes, using the drill with a 7.5mm bit, at a slight angle for the dowel sticks. Added some Wood Glue to each hole and inserted the dowel sticks.
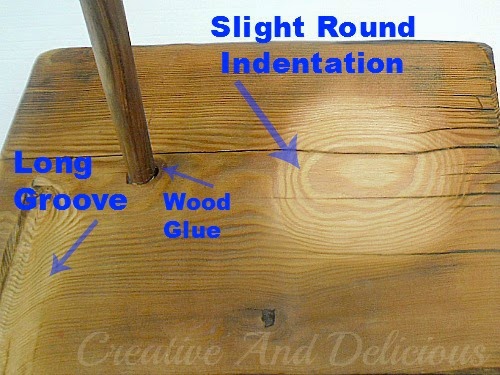
He used the grinding wheel to make a very slight indentation for the spoon to rest in and a deeper groove for the lid.
After another clean, we spray painted the Pot Lid and Spoon Rest completely with Heat Resistant Clear Varnish.
DIY POT LID AND SPOON REST

We left the wood mainly as is, as I kinda like the shabby, rough-ish look. The corners did however get a light sanding before we sprayed the Varnish.
No more dripping on the counter tops, stove or the floor !
LINDA
You Might Also Like:
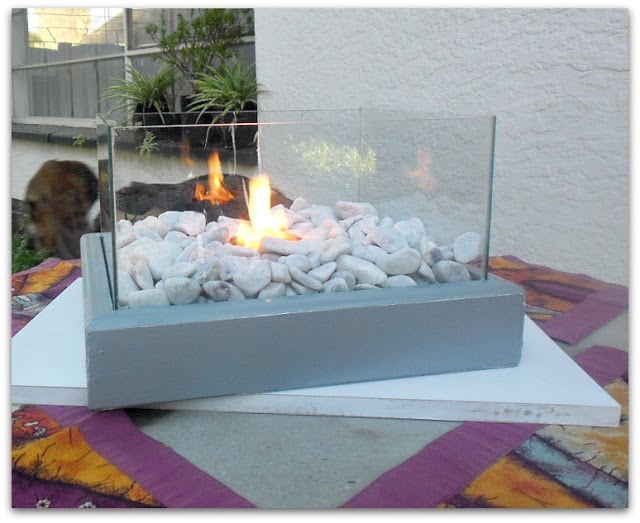
DIY PORTABLE FIRE FEATURE

G'day from Oz! Many thanks for linking up to the Say G'Day Saturday link up and sharing this great idea.
Hope you can join in again this weekend.
Best wishes,
Natasha in Oz
Such a great idea! I totally need one of these!
Very clever I am always trying to find somewhere to put the lid while cooking!
This is so practical, and it's something I need. Thank you for sharing your idea.
Great idea 🙂 thanks for sharing at Creative Mondays…
What a great idea Linda – oh how I could use one of these! So glad it caught my eye over at The Scoop Party.
Marie@The Interior Frugalista
Good job! I need my hubby to make one of these.
I think this is a great idea and would be awesome for Mother's Day
Totally genius!! You should make and sell these girl!!
That's genius I need to get jules to make something lie this for me, I love the rustic look too very comforting 🙂